
Comprehensive guide to managing product images in V2, including upload methods, organization, bulk operations, and editing.
Image Browser
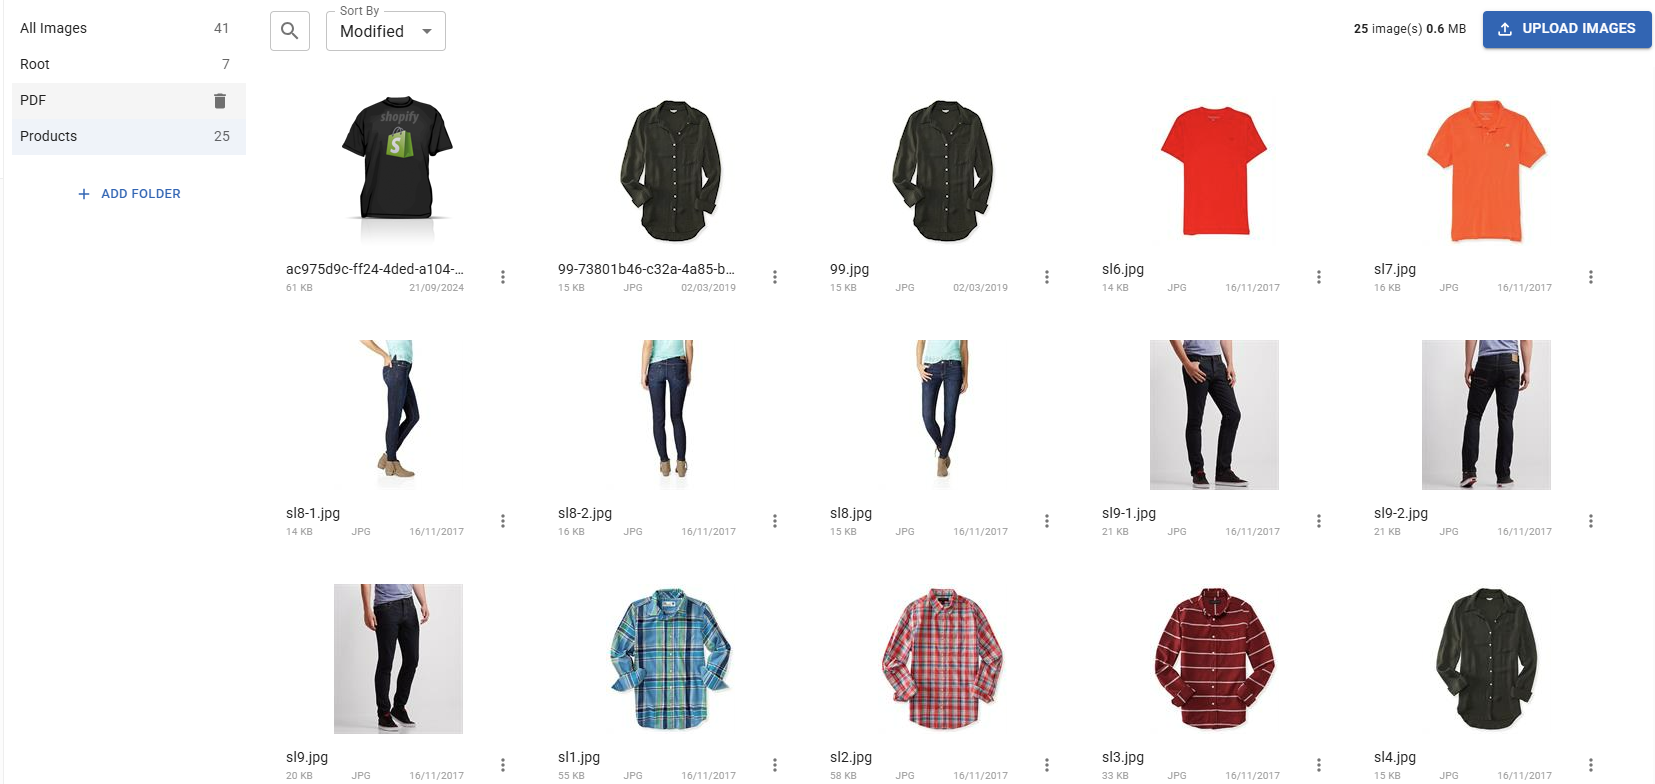
Access at Products > Images - centralized hub for all image management.
Key Features:
- Browse all images across folders
- Search and filter by name or folder
- Sort by name, size, or date
- Grid view with thumbnails
- Batch operations (download as ZIP, move, delete)
- Folder organization
- Upload tracking with progress
Upload Methods
1. Direct Upload (Computer)
Single or Bulk Upload:
- Products > Images
- Click "Upload Images" button
- Select multiple files from computer
- Choose destination folder (optional)
- Upload with progress tracking
Supported Formats: JPG, PNG, WebP, GIF Recommended Size: 1500-2000px width for optimal quality
Uploads are downscaled by plan. Paid accounts keep images up to 1600px; free accounts are reduced to 800px. Uploading a larger file does not raise the ceiling, so a free account will not get a sharper result from a 2000px original.
⚠️ Same Filename = Replacement
Uploading an image with the same name as an existing image in the same folder replaces the file. All products referencing that image path will display the new image. Rename files before upload to avoid unintended changes.
Important: After replacing an image, it may take up to 8 hours for the new version to appear in published catalogs and showrooms due to CDN caching. To see changes immediately, upload with a different filename instead (e.g.,
logo-v2.pnginstead oflogo.png).
2. Upload from URL
Web Image Import:
- Products > Images > Upload Images
- Switch to "From URL" tab
- Paste image URL(s)
- Select folder destination
- System downloads and stores images
Use Cases:
- Import from existing websites
- Bulk import from image hosting
- Shopify product images (via sync)
Cloud Storage URL Conversion:
Some cloud services require URL adjustments for direct download:
- Google Drive: Change
https://drive.google.com/file/d/FILE_ID/viewtohttps://drive.google.com/uc?export=download&id=FILE_ID - Dropbox: Change
dl=0todl=1at the end of the URL
Batch Download Tip: Use browser extensions (e.g., Chrome Download All Images) to save images from web pages, then upload them via Direct Upload.
Troubleshooting: If images fail to download, the source site may have hotlink protection (common with Cloudflare). Download the images to your computer first, then use Direct Upload.
3. CSV Import with Images
Import products with image references:
- Products > Import from CSV
- Include Image column with:
- Full URLs (https://example.com/image.jpg)
- Existing image paths (folder/image.jpg)
- System downloads URLs or links existing images

CSV Format Example:
Name,SKU,Category,Price,Image
Product A,SKU001,Electronics,29.99,https://cdn.example.com/img1.jpg
Product B,SKU002,Electronics,39.99,images/product-b.jpg
4. Shopify Sync
Automatic Image Import:
- Connect Shopify in Settings > Integrations
- Product images sync automatically
- Stored in
shopify/folder by default - Updates on each sync
Folder Organization
Create Folders:
- Images browser
- Click folder icon or "New Folder"
- Name folder (letters, numbers, hyphens)
- Use for logical grouping
Folder Structure Examples:
Root/
├── products/
│   ├── apparel/
│   ├── electronics/
│   └── furniture/
├── shopify/
├── seasonal/
│   ├── spring-2025/
│   └── holiday/
└── marketing/
Move Images Between Folders:
- Select images (checkboxes)
- Click "Move to folder..."
- Choose destination folder
- Confirm bulk move
Image Editing
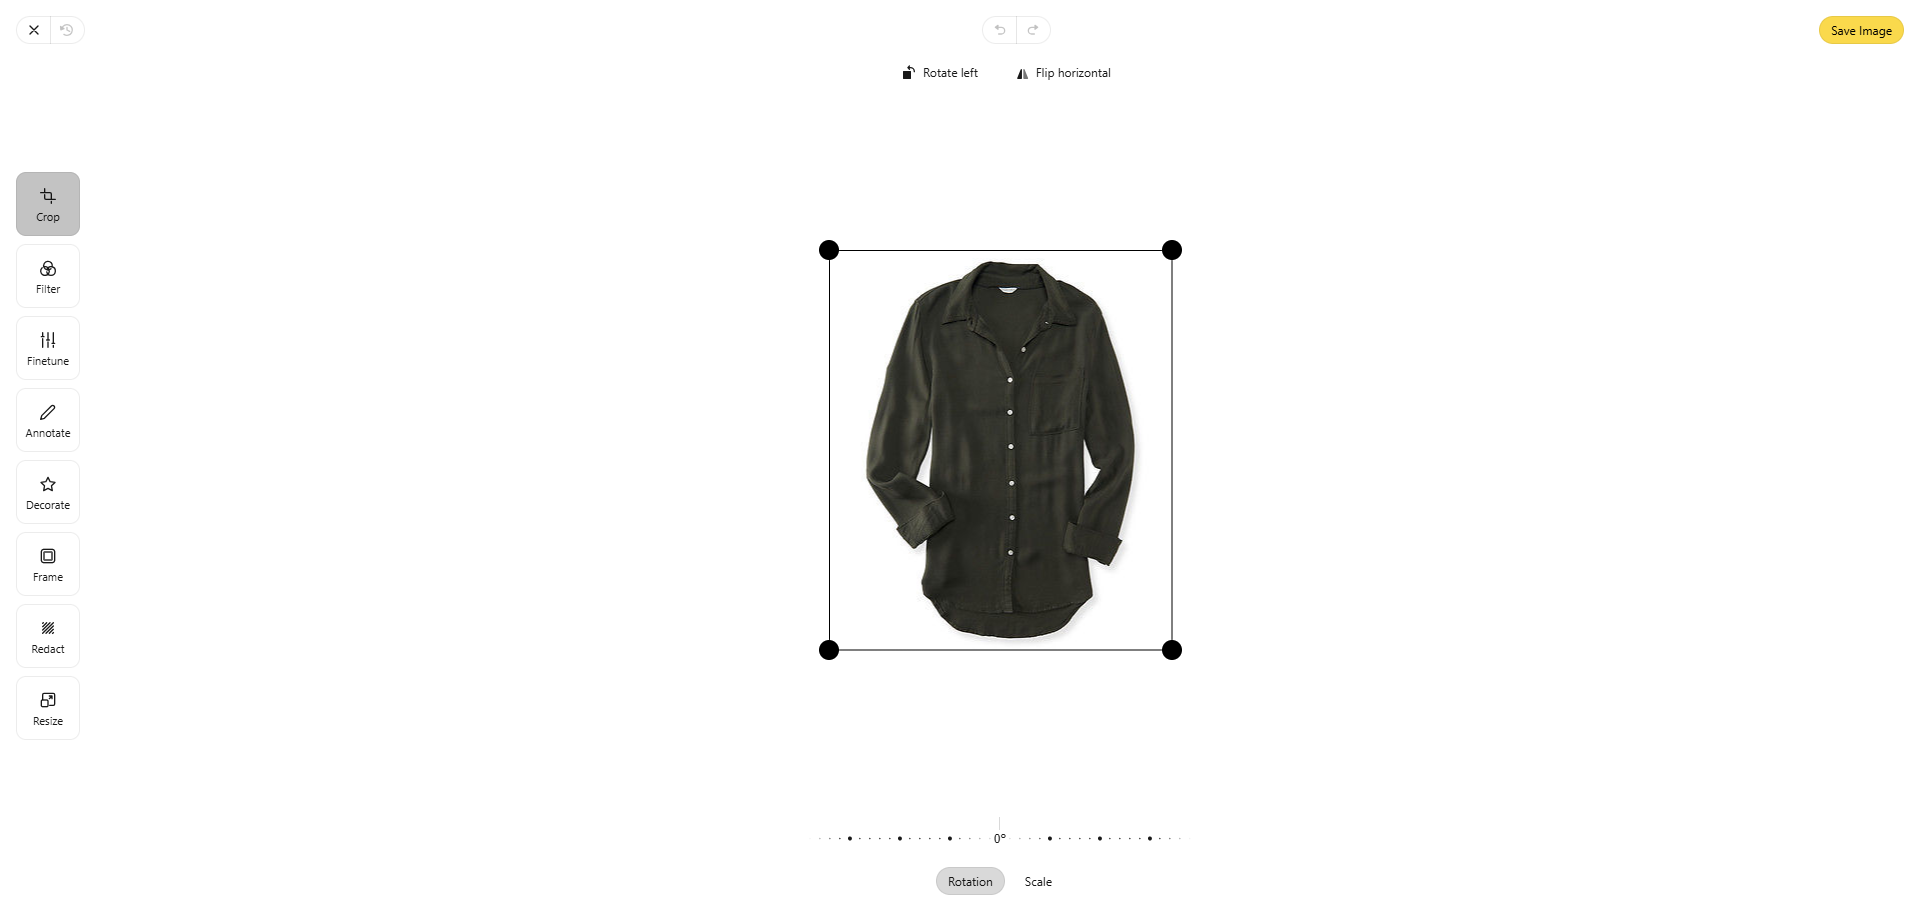
Built-in Editor (Pintura)
Access:
- Hover over image thumbnail
- Click edit icon
- Opens in-browser editor
Editing Features:
- Crop and resize
- Rotate and flip
- Adjust brightness/contrast/saturation
- Filters and effects
- Annotations and text overlay
- Undo/redo
- Save creates new version
Use Cases:
- Quick corrections without external tools
- Standardize aspect ratios
- Enhance product photos
- Add watermarks or branding
Image Replacement
Update Product Image:
- Navigate to product
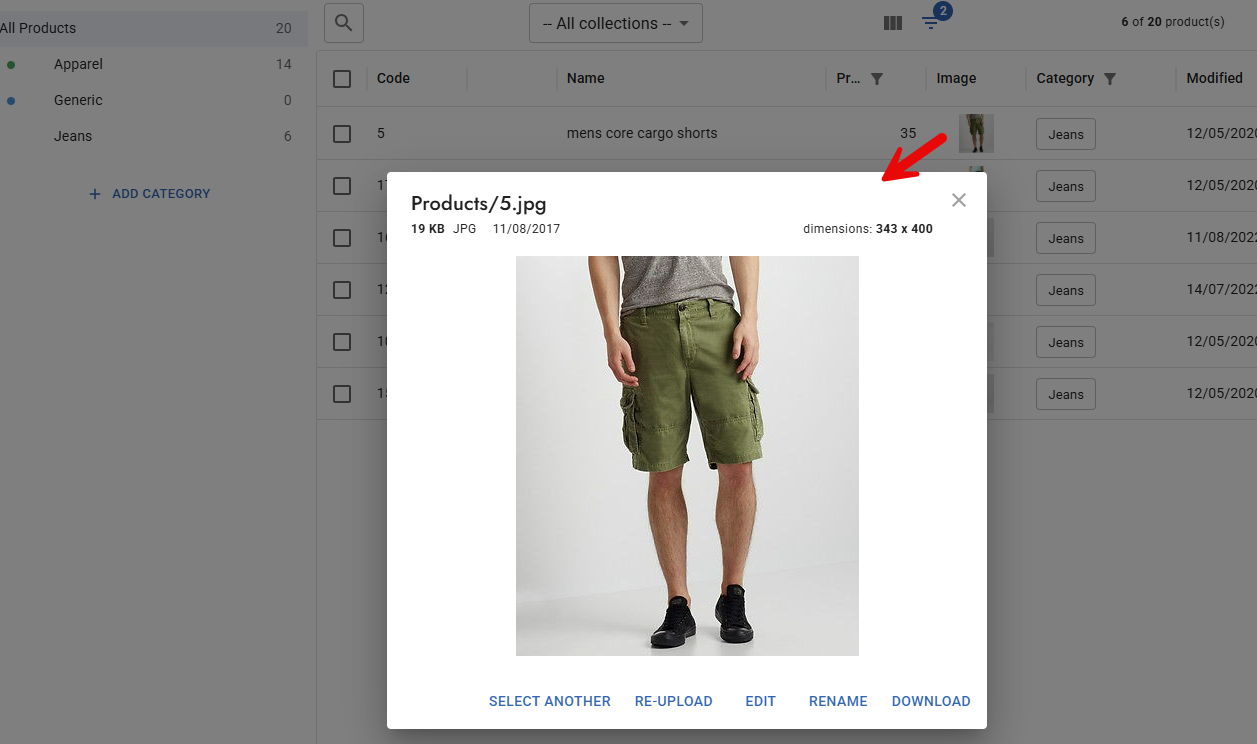
- Click image thumbnail
- Choose "Replace" or "Upload New"
- Select new file
- Automatically updates everywhere used
Same filename is fine. Every image link carries a version marker that moves the moment you save a new file, so browsers and the CDN fetch the new bytes instead of a stored copy. You do not need to rename the file to force an update. See Image Updates Not Reflecting if an already-published catalog still shows the old picture.
Bulk Operations
Select Multiple Images
Selection Methods:
- Individual: Click checkboxes on thumbnails
- Range: Shift+click for range selection
- All visible: "Select All" button
- Filter first, then select all matching
Batch Actions

Move Images:
- Select multiple images
- Click "Move to folder..."
- Choose destination
- Confirm (preserves product links)
Delete Images:
- Select images
- Click "Delete" button
- Confirm deletion
- ⚠️ Warning: Removes from products using them
Download Images (ZIP backup):
You can export your images as a single ZIP file — useful for keeping an off-platform backup.
Download everything:
- Products > Images, with All Images selected on the left
- Click Download all (next to "Upload Images")
- A ZIP of every image in your account downloads, with your folder structure preserved
Download one folder:
- Click a folder on the left (e.g. Products)
- The button changes to Download (N) — click it to get a ZIP of just that folder
Download a hand-picked selection:
- Select images with the checkboxes
- Click Download in the selection toolbar
- A ZIP of only the selected images downloads
Notes:
- Images come back exactly as stored — original files, not compressed or resized copies
- The ZIP is named with the date and time (and folder, if you downloaded one) — e.g.
images-products-2026-07-27-1846.zip— so repeated backups don't overwrite each other - Folder names are preserved inside the ZIP (e.g.
shopify/shirt-blue.jpg) - Large accounts take a while to prepare — leave the tab open until the download starts
- Very large libraries (many GB) can time out. If that happens, download folder by folder using Select all inside each folder, or contact support.
Single images can still be saved one at a time with the per-image Download option (hover an image, then click Download).
Product Image Management
Assigning Images to Products
During Product Creation:
- Products > Add Product
- Click "Add Images"
- Options:
- Upload new
- Select from image browser
- Paste URL
For Existing Products:
- Edit product
- Click on the image field to open the image picker
- Choose from upload, image browser, or paste URL
Multiple Images per Product
To display multiple images on products, add Image-type fields to your category:
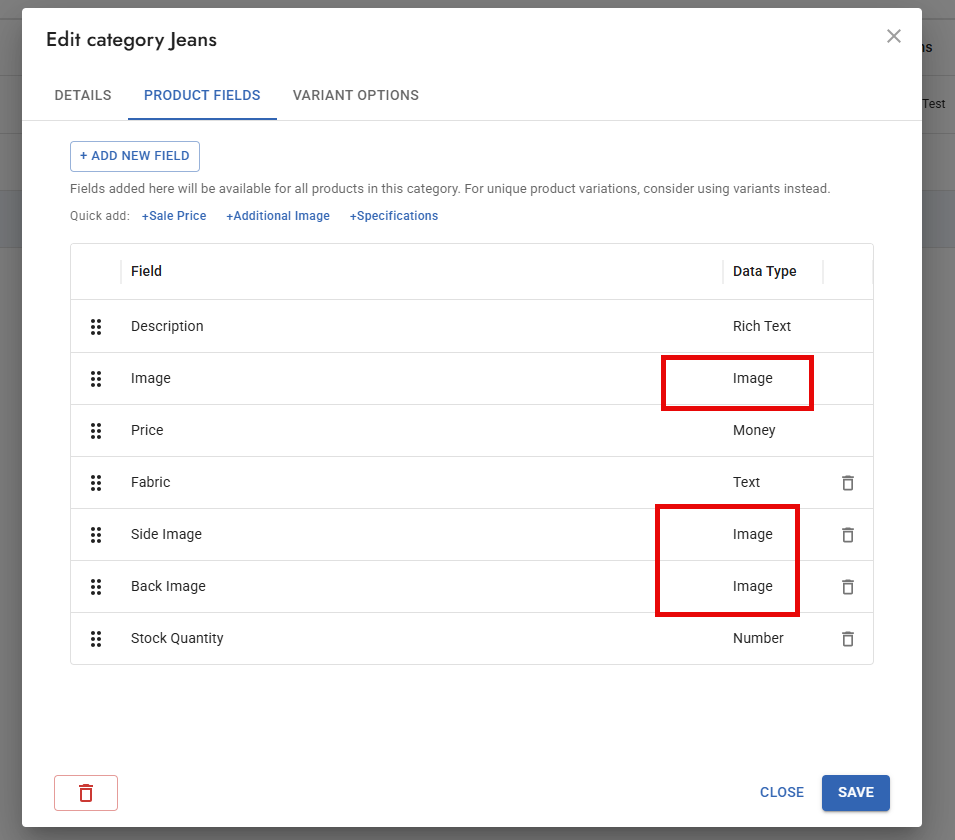
How it works:
- Each Image field in the category = one image slot on products
- Add fields like "Image", "Image 2", "Detail Image", etc.
- Use in Product Cards:
{{Image}},{{Image 2}},{{Detail Image}}
In catalogs and showroom:
- First image = primary (thumbnails, listings)
- Additional images appear in galleries and detail views
- Drag to reorder within product edit
Image Variants
Different images for product variants:
- Each variant can have unique image
- Configure in Product Variants section
- Shopify variants map automatically
- Useful for color/style variations
Image Optimization
Automatic Optimization
V2 automatically optimizes images:
- Compression without visible quality loss
- Format conversion (WebP for web)
- Responsive sizing for different displays
- CDN delivery for fast loading
Manual Optimization Tips
Before Upload:
- Source images: 1500-2000px width recommended
- Compress large files (>5MB) before upload
- Use JPG for photos, PNG for graphics/logos
- Remove EXIF data for privacy
Sizing Guidelines:
- Catalog thumbnails: 400x300px sufficient
- Full-page catalog images: 1500-2000px
- Showroom display: 1200-1500px
- High-res for zoom: 2000-3000px
Performance Impact:
- Smaller images = faster page loads
- Balance quality vs file size
- Use appropriate size for context
Advanced Features
Image Search & Filter
Quick Find:
- Search by filename
- Filter by folder
- Sort by size/date/name
- Recently uploaded filter
Image Usage Tracking
See Where Image is Used:
- Click image details
- "Used in Products" section
- Shows all products using this image
- Direct links to products
Image URLs & Paths
Reference images in expressions:
- Path format:
folder/image.jpg - Full URL: Auto-generated CDN link
- Use in Product Expressions:
{{Image}} - Embed in custom pages
Best Practices
Organization Strategy
Folder Structure:
- Create folders by product type or category
- Use seasonal/campaign folders
- Keep Shopify imports in dedicated folder
- Archive old images (don't delete if used)
Naming Conventions:
- Descriptive filenames:
blue-widget-front.jpg - Include SKU for easy matching:
SKU001-main.jpg - Avoid spaces (use hyphens)
- Keep names short but meaningful
Quality Standards
Image Guidelines:
- Consistent backgrounds (white/neutral recommended)
- Uniform lighting across products
- Same aspect ratios per category
- Professional product photography when possible
- High resolution originals (can always downsize)
Multilingual Considerations:
- Keep product images language-neutral when possible
- Use separate image variants for text-heavy graphics
- Text overlays in images should match the target language
Workflow Efficiency
Import Strategy:
- Bulk upload images first (organized into folders)
- Create/import products
- Assign images during product creation
- Use CSV import for large catalogs (map images by path)
Maintenance:
- Regular cleanup of unused images
- Archive campaign/seasonal images after use
- Keep master high-res copies outside platform
- Sync with Shopify for e-commerce stores
Storage Management
Monitor Usage:
- Account > Billing shows storage used
- Plan limits apply to total image storage
- Optimize large images to save space
- Delete unused images to free space
Storage limit depends on the plan. Free has the smallest allowance and each paid plan raises it. The plan comparison gives the exact limit for each plan.
Upgrade plan if reaching limits or contact support for custom storage.
Troubleshooting
Upload Issues
Image Won't Upload:
- Check file format (JPG, PNG, WebP, GIF supported)
- Verify file size (<50MB per image)
- Check storage quota (Account > Billing)
- Try different browser if issues persist
Slow Uploads:
- Large files take time (compress first)
- Upload in batches (<20 images at once)
- Check internet connection speed
- Off-peak hours may be faster
Image Quality Problems
Blurry Images in Catalog:
- Source image too small (use higher resolution)
- Check PDF export settings (disable compression)
- Verify image size matches usage (full-page needs 1500px+)
Images Not Displaying:
- Check if image file still exists in browser
- Refresh product to reload image links
- Re-sync if Shopify image
- Contact support if issue persists
Product Image Sync
Shopify Images Not Syncing:
- Verify Shopify connection in Settings > Integrations
- Trigger manual sync
- Check sync logs for errors
- Ensure images exist in Shopify product
Image Updates Not Reflecting (after replacing an image with the same filename):
Replacing an image under the same filename updates everywhere on its own. Image links carry a version marker that changes when you save a new file, so the old picture is not served back from a cache. Do not rename the file to force an update, and do not wait it out.
If a published catalog or showroom still shows the old picture:
- Rebuild the catalog. Open it and generate the PDF again, or re-publish. A page built before you replaced the image still points at the previous version marker until it is rebuilt.
- Refresh the CDN copies. On Products > Images, open the ⋮ (More) menu beside Upload Images and choose "Refresh CDN copies". Inside a folder it refreshes that folder only. This is a repair for links published before version markers existed, so it is rarely needed.
- The viewer's own browser can still hold the old image briefly, and nothing on our side reaches it. Ask them to hard refresh (Ctrl+F5, or Cmd+Shift+R on Mac) or open the link in a private window.
PDFs follow the same rule. Once an image inside a catalog changes, the stored PDF is no longer reused, so the next download is rendered with the new image. See Catalog Designer if a shared PDF link specifically is still serving an old file.